Log in to the Harbor system
Before proceeding with this help guide, you must be logged into the Harbor financial system. For your security, Harbor requires Multi-Factor Authentication (MFA) to complete the login process.
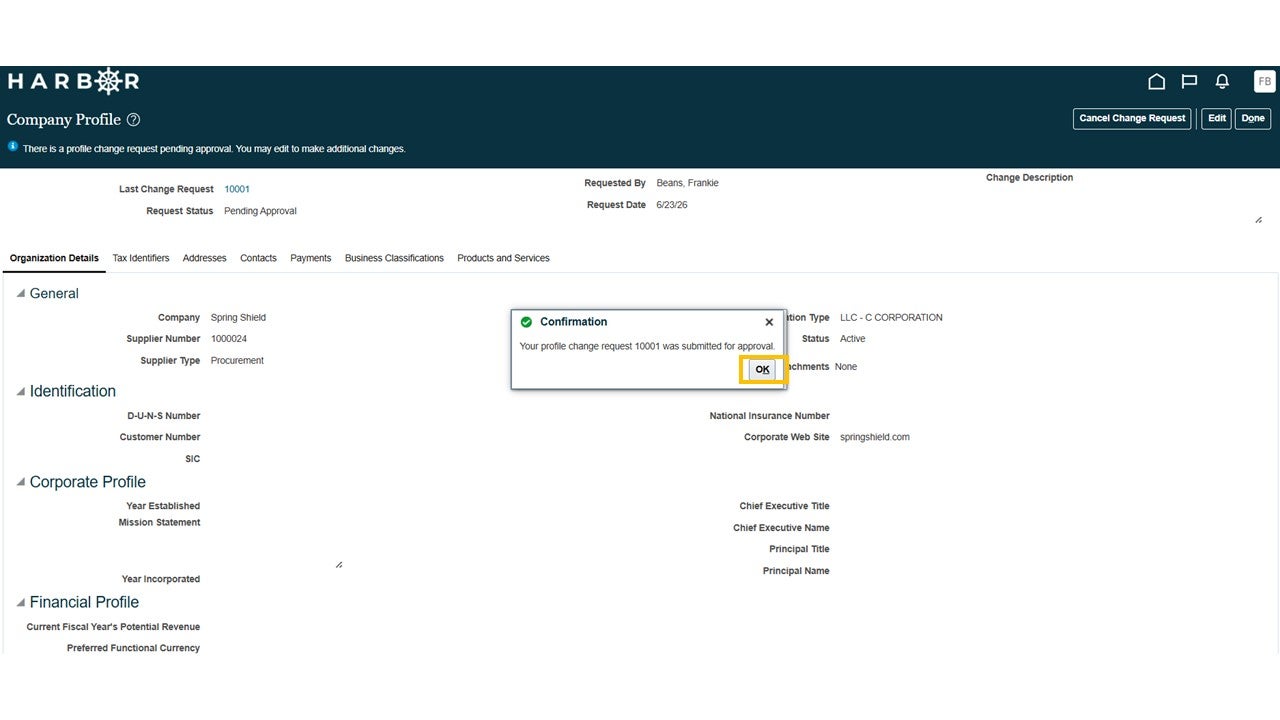
1Click on the Supplier Portal tab.
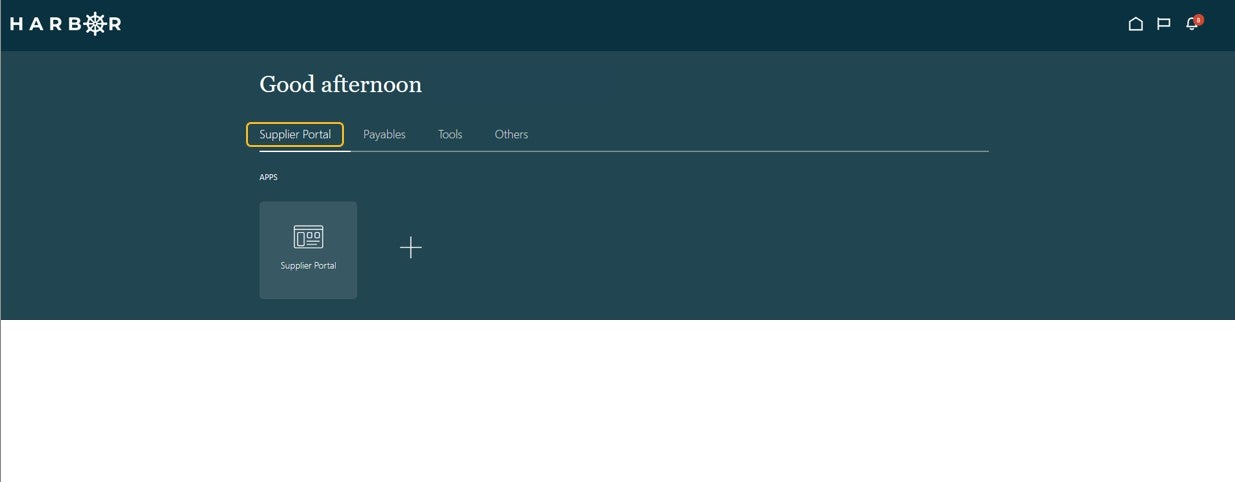
2Click into the Supplier Portal app to access the Work Area.
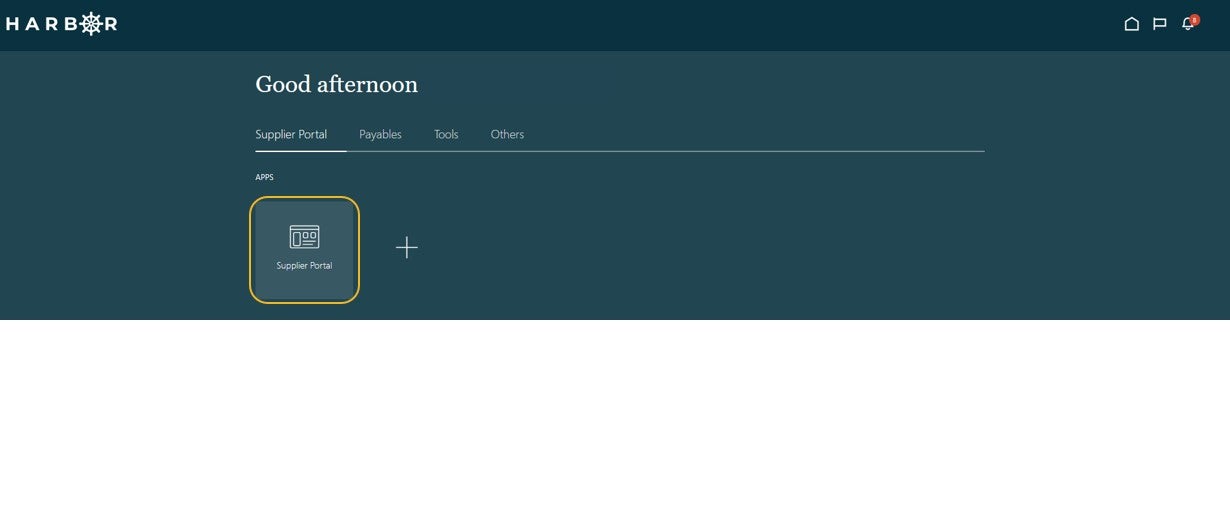
3Select "Manage Profile" within the task window on the left side of the screen.
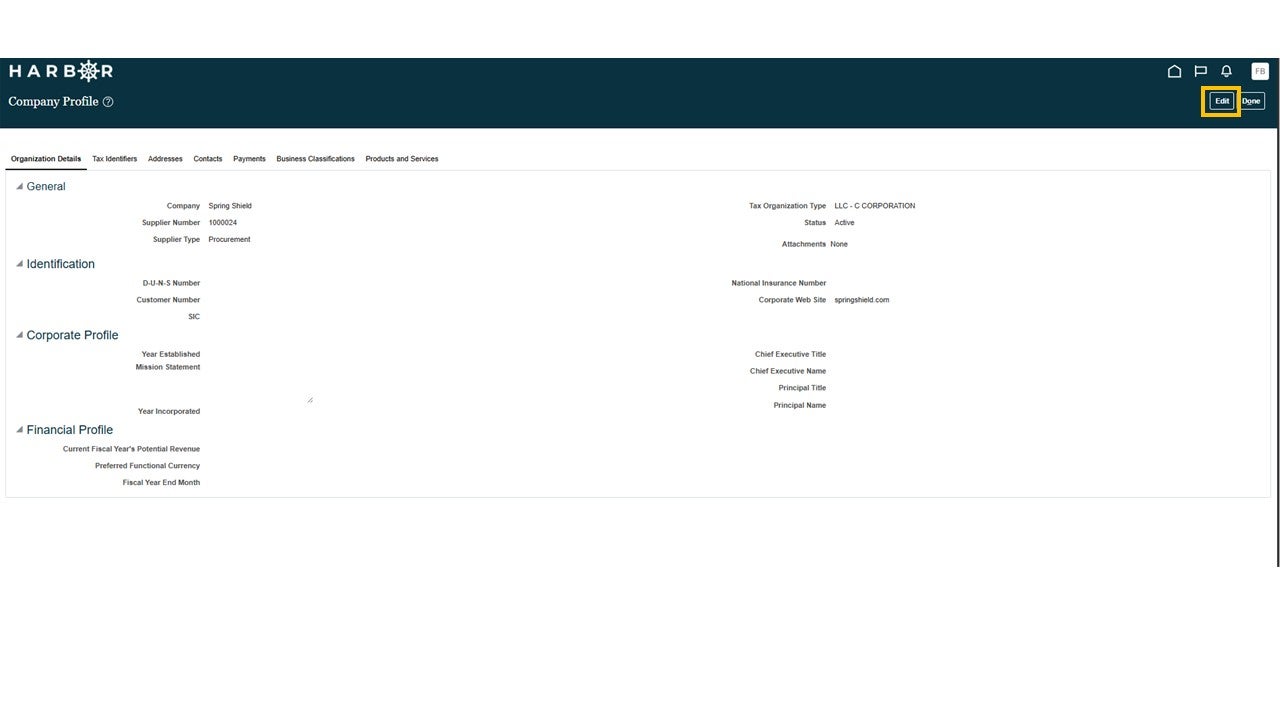
4Click on the Edit button in the top right corner of the screen.
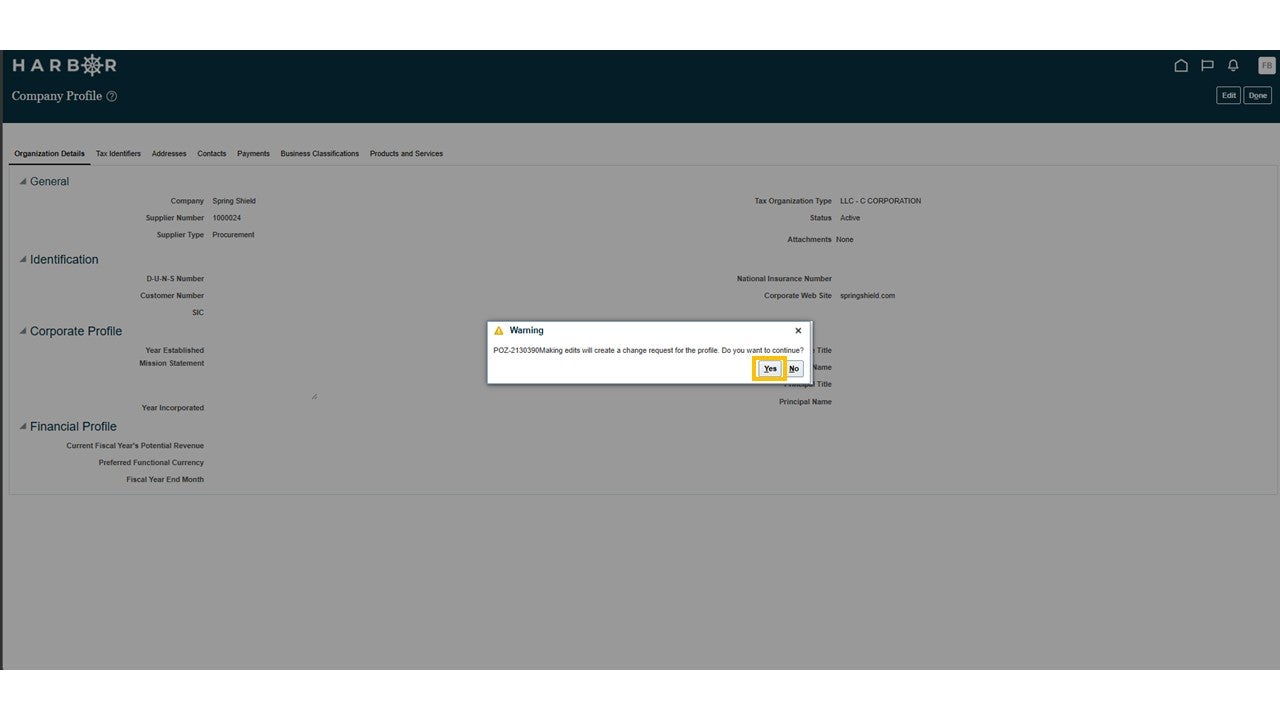
5A warning window will pop up that says "Making edits will create a change request for the profile. Do you want to continue?" Click the Yes button.
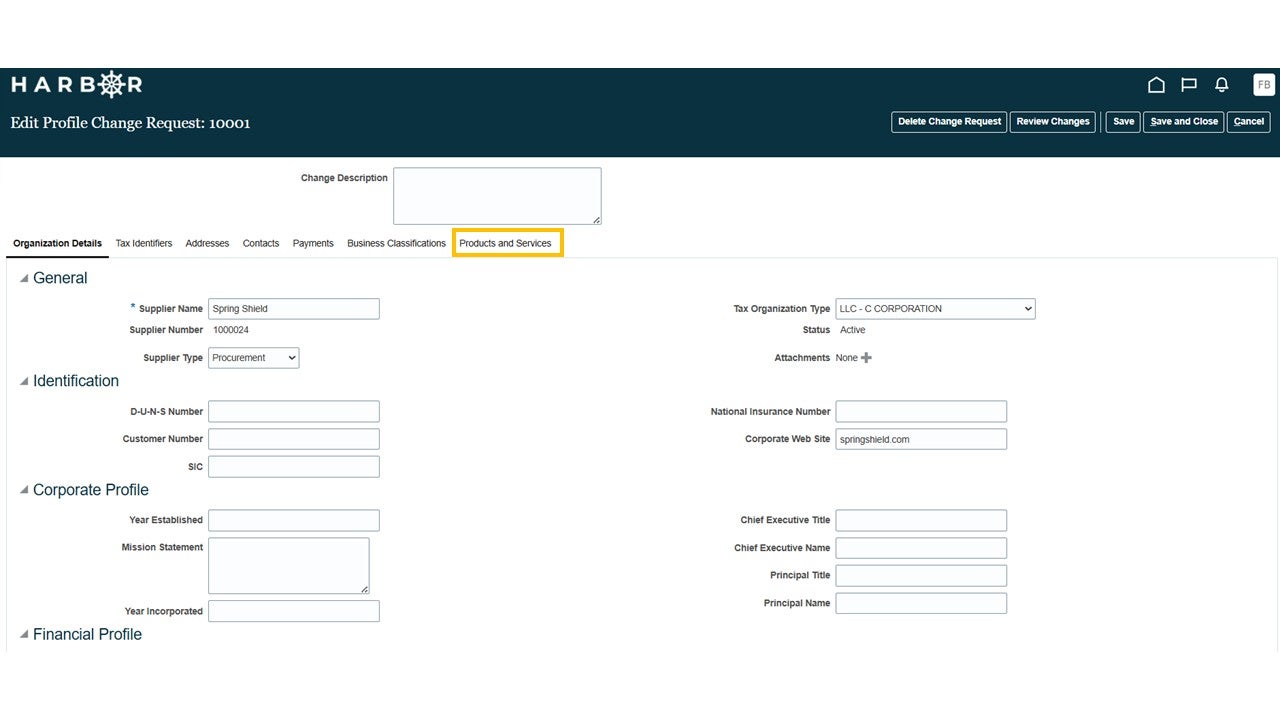
6Click on the Products and Services tab.
7Click on the Actions drop-down menu and select the Select and Add option.
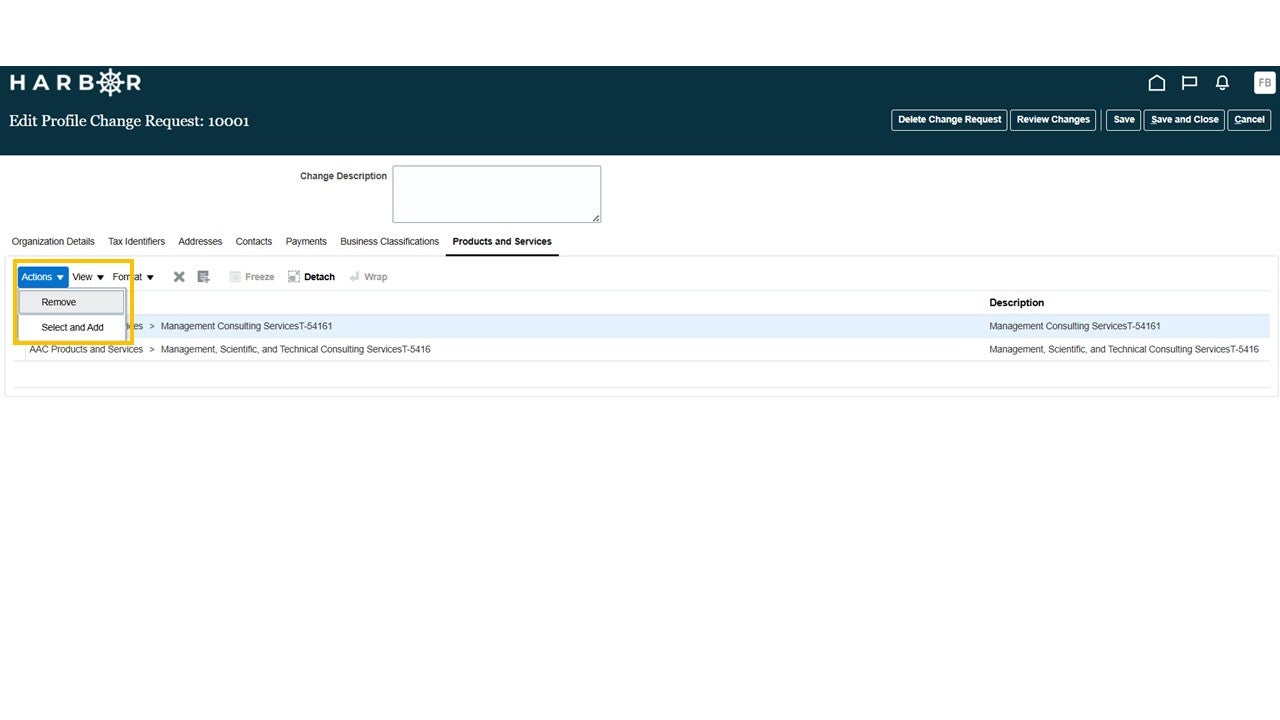
If you would like to remove an existing product or service, click the Remove option and select the product or service you would like to remove.
8Search for the product or service you would like to add by using either the Category Name or Description fields.
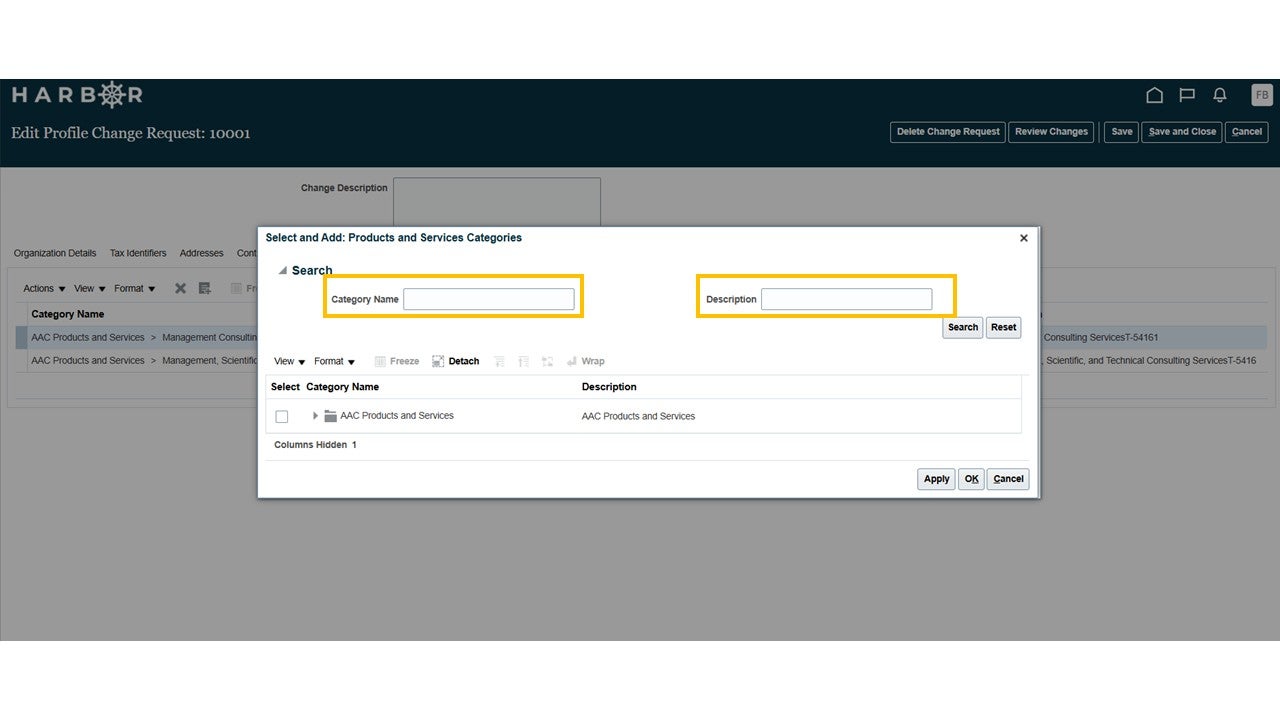
The Category Name field searches the official system-defined category labels, which are often more structured and precise, while the Description field searches the plain-language explanations of those categories, making it easier to find relevant options using everyday terms. You get broader, more intuitive results using Description, and more exact matches using Category Name.
NAICS (North American Industry Classification System) codes classify businesses based on their primary economic activity. In Harbor, they help classify suppliers to match them with relevant procurement opportunities.
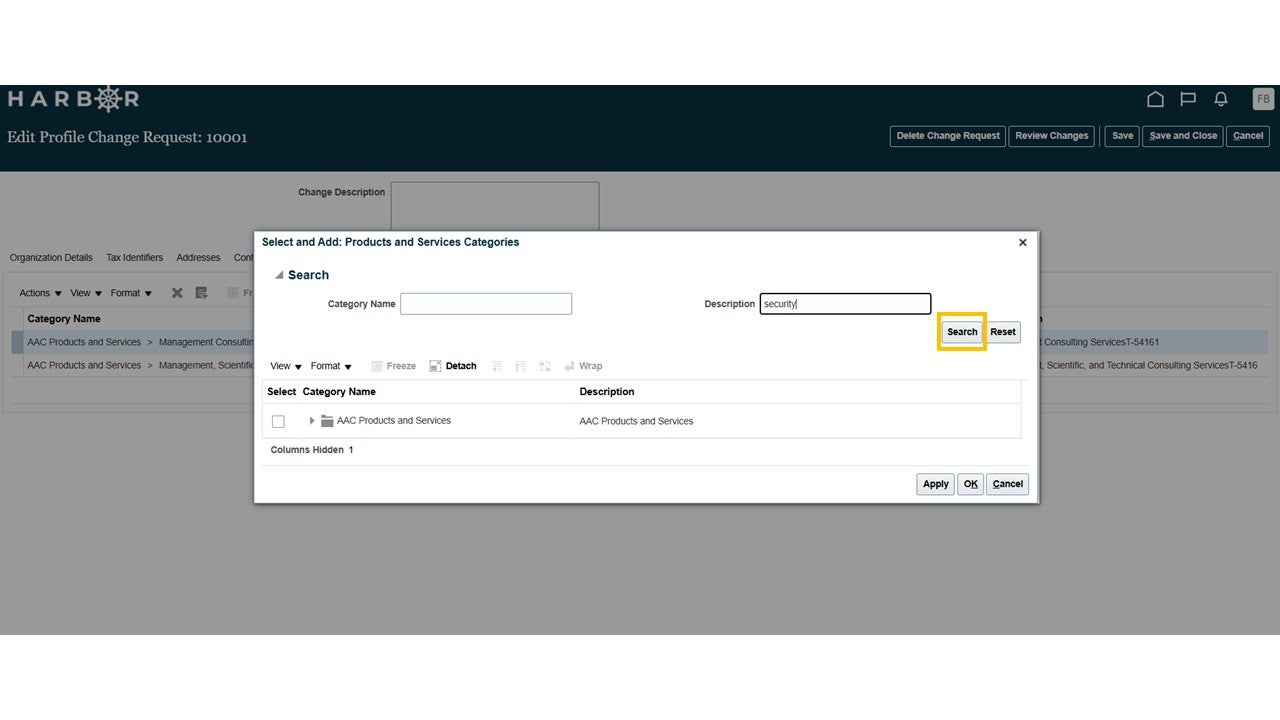
9After entering your search terms, click the Search button.
10Select the products and services that are relevant for your business and click Apply.
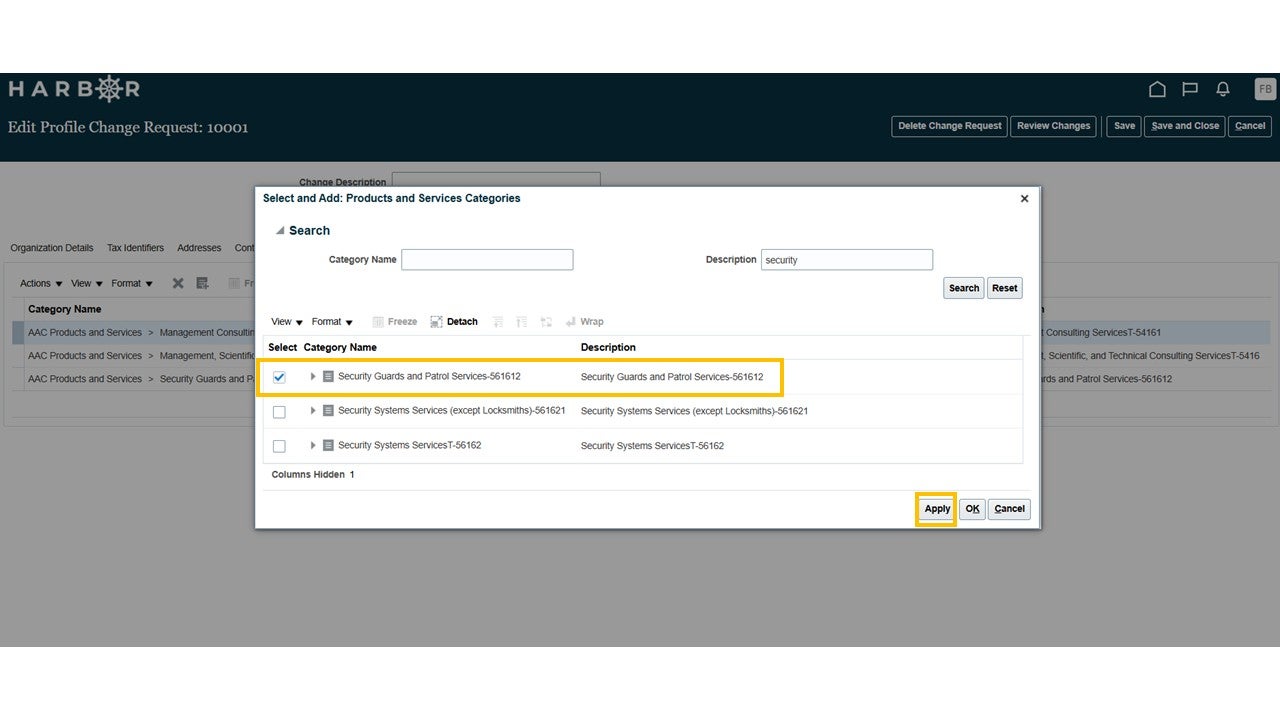
You can add as many products and services as needed.
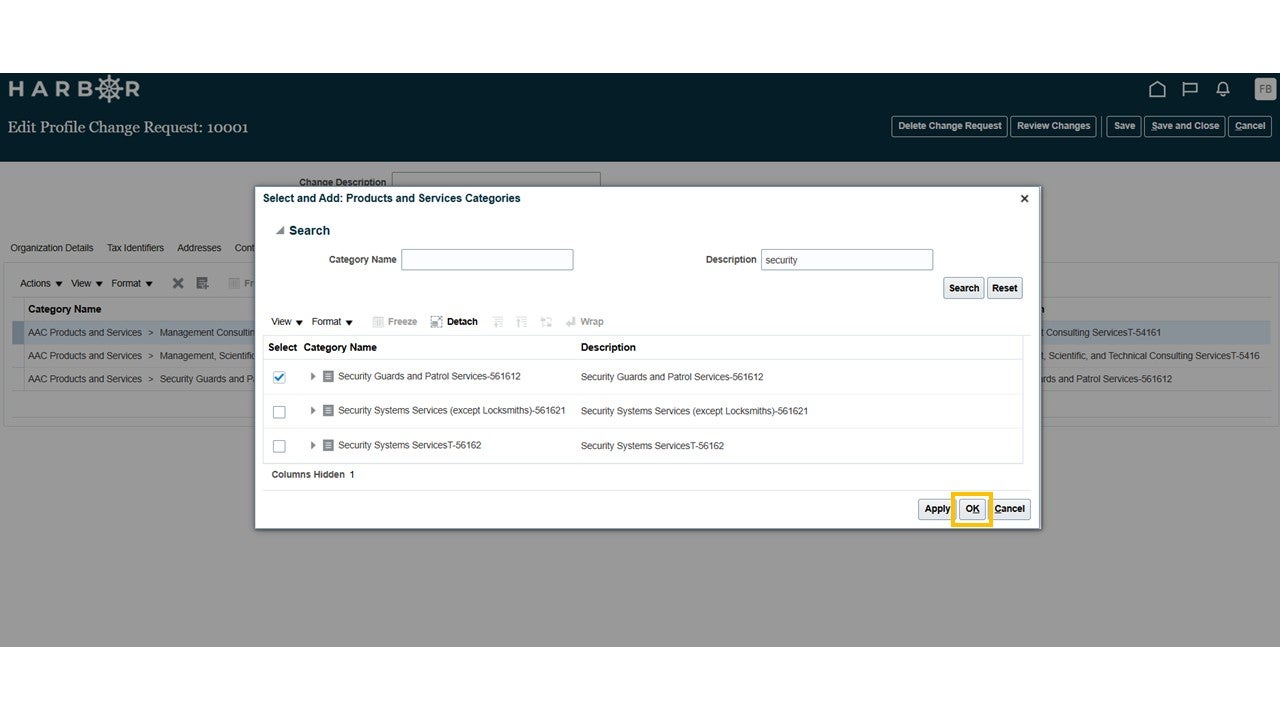
11Once you’ve finished selecting them, click OK to save your selections.
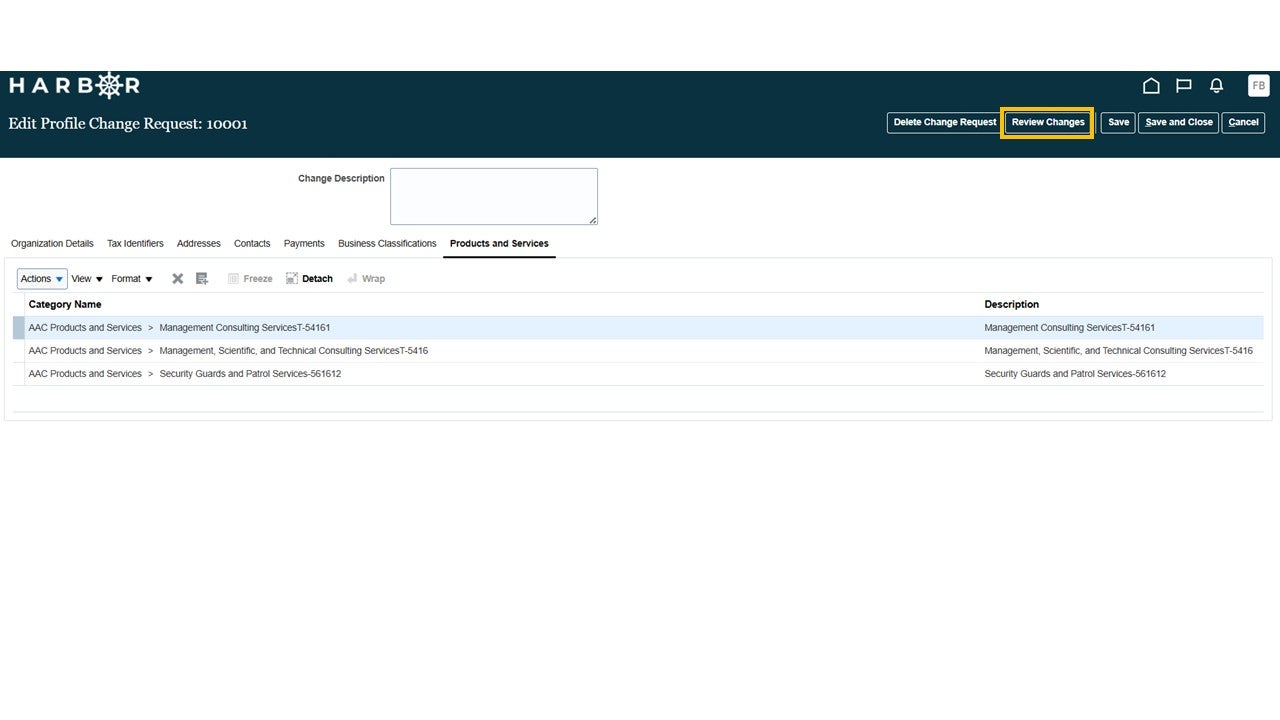
12Click the Review Changes button.
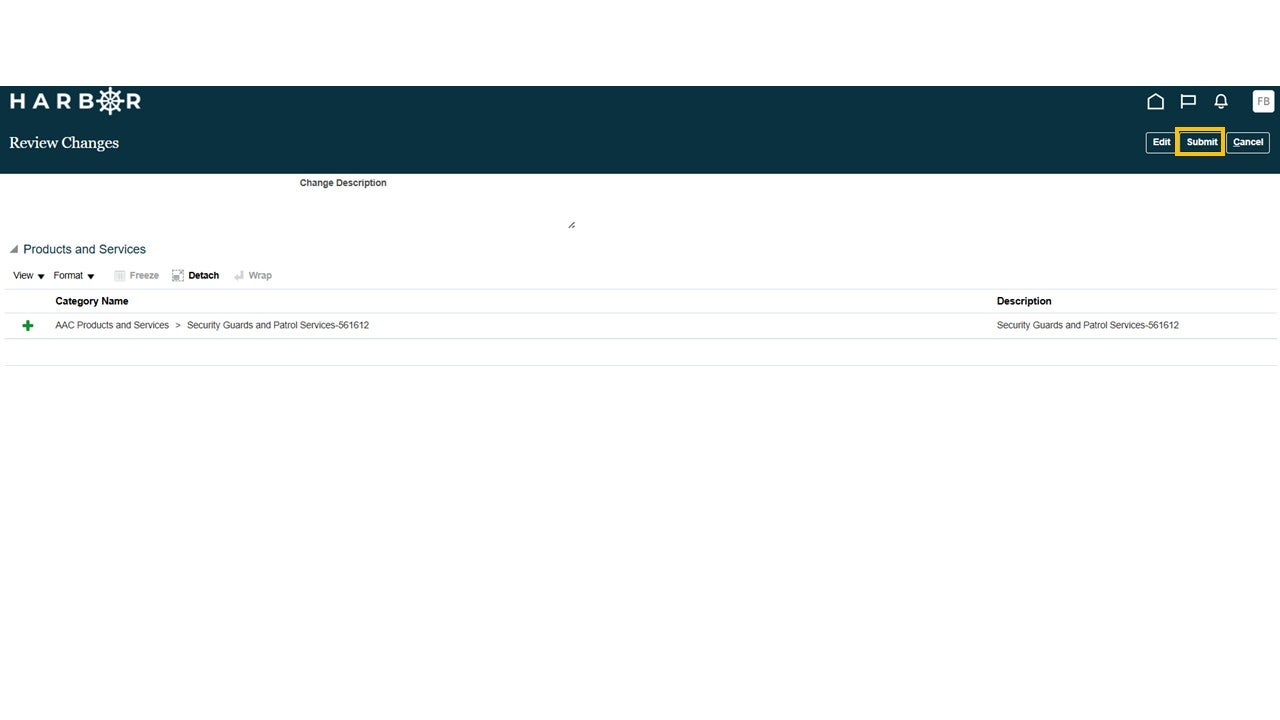
13Review your changes and click the Submit button.
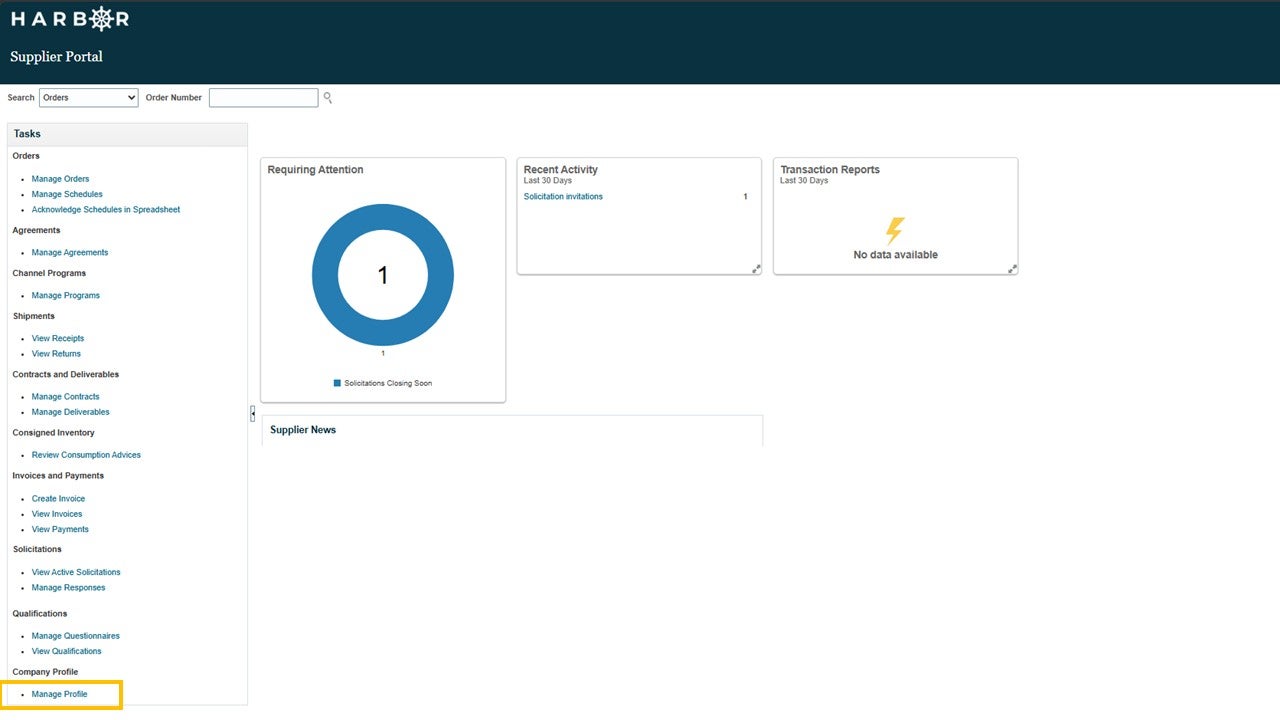
14A confirmation pop-up window will appear. Click OK.