Emergency Work Location Entry
Start with the Maintenance Permit Location Entry form.
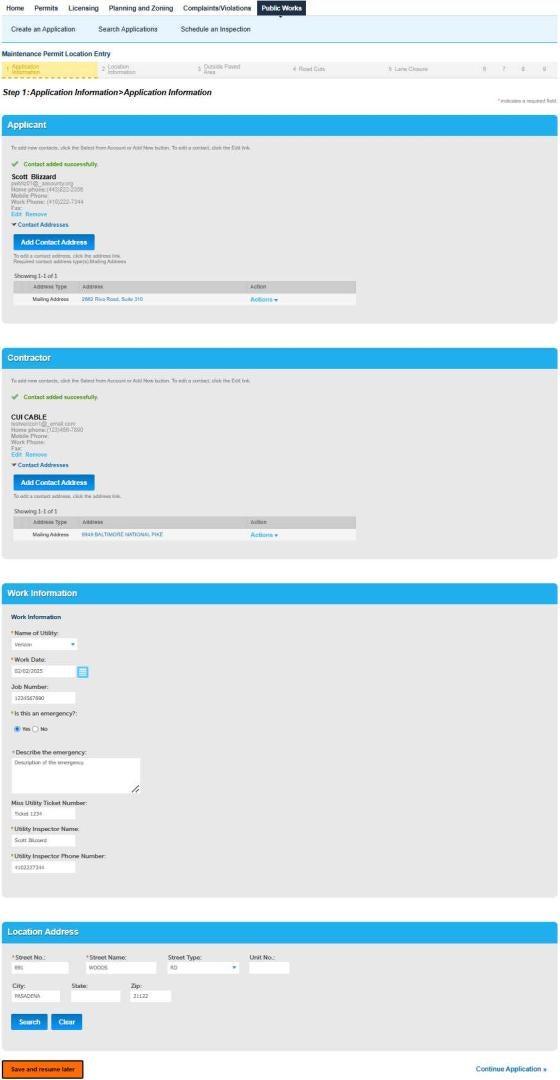
Applicant
Make sure your account is set up correctly before entering a maintenance location.
Click Select From Account and select the Applicant from the list.
Contractor
Click Select From Account and select the Contractor from the list.
The contractor’s name must be spelled and formatted identically as the Organization Name submitted by the Utility during registration.
Work Information
Select the Utility from the dropdown
Select the Work Date from the Calendar.
The Work Date is limited to the current date and the next six calendar days.
Enter the Job Number provided by the Utility.
Select Emergency = Yes.
Describe the Emergency
Enter a Description of the emergency
Enter the Miss Utility ticket number.
Enter the Utility Inspector Name.
Enter the Utility Inspector Phone Number.
Location Address
Enter a house number (Street No.) and the first couple of letters in the Street Name field.
Click Search.
Select an Address in the popup window. Then click Select.
The address should be located somewhere in the proposed work area.
Only enter the house number and the first couple of letters of the road name.
You must click Clear between entry attempts.
In the popup only select an option form the Address section. Ignore the other sections.
Click Continue Application.
Submitting an Maintenance Location (Utility)
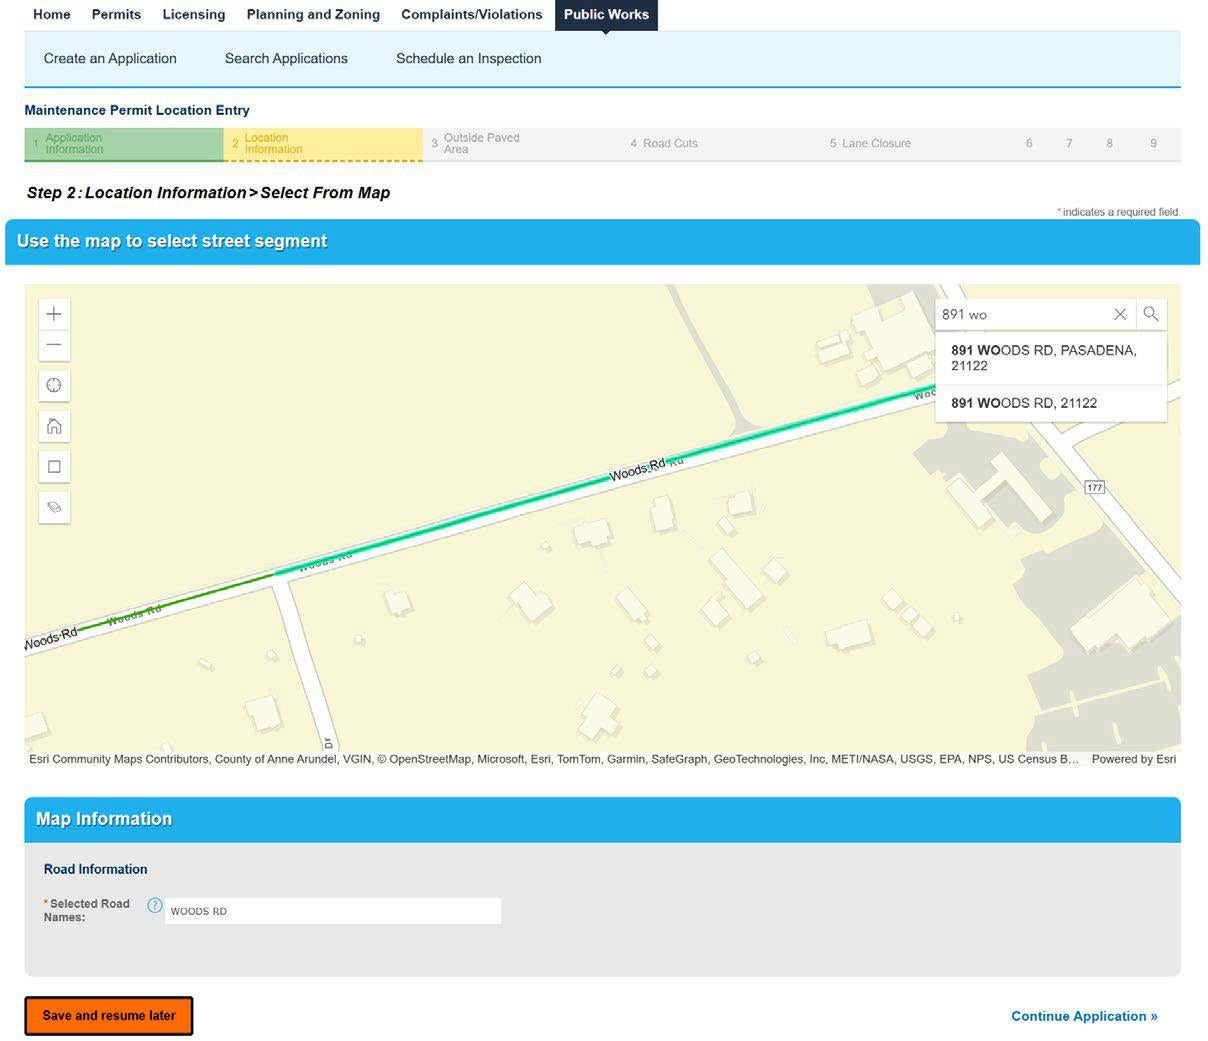
Select From Map
Start typing the house number and street name in the map search field.
Click on the roads for the proposed work
Clicking on a road will toggle it on or off.
The map only displays Anne Arundel County maintained roads.
Red – Arterial
Green – Collector
Blue – Local
Map Information
Displays the roads selected on the map.
Do not alter the information in this field.
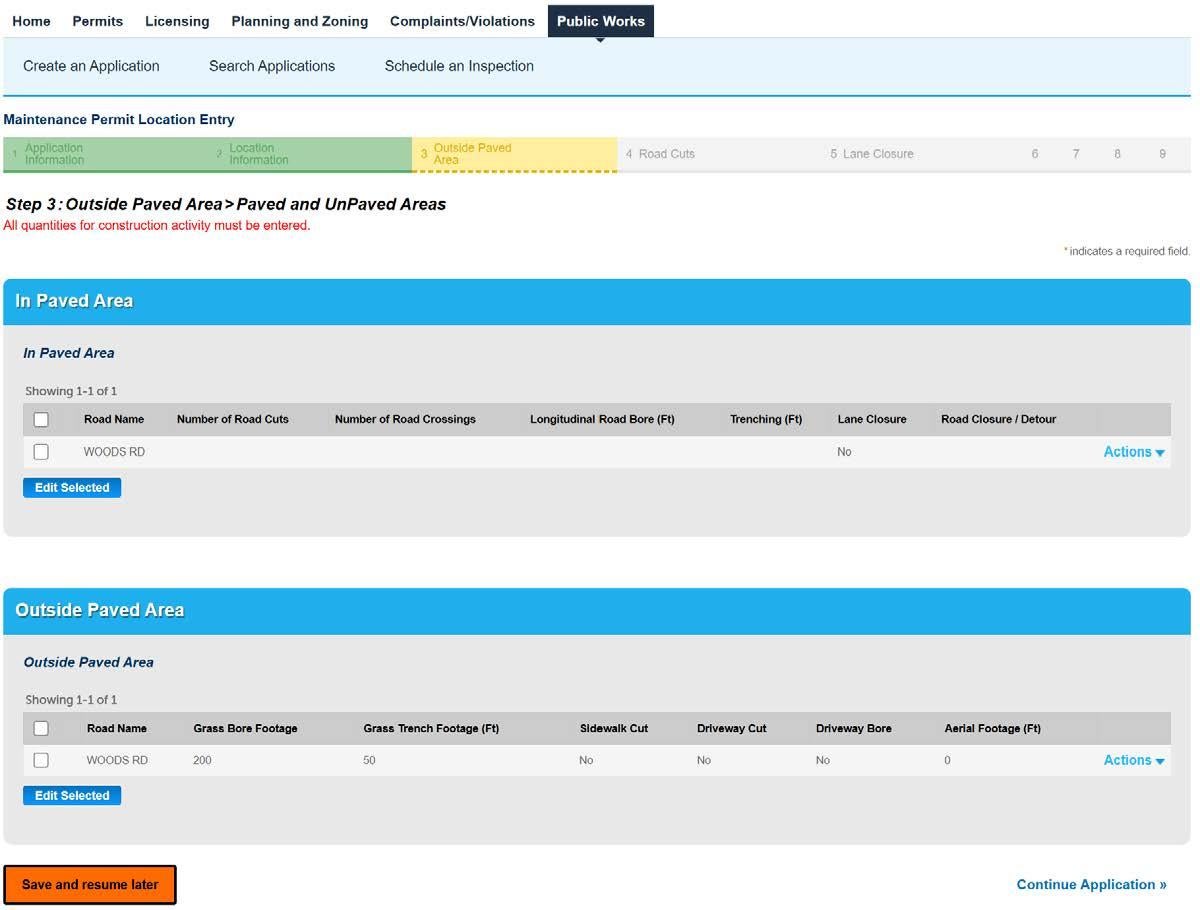
Location Information
In Pavement
Edit the listed road(s).
Number of Road Cuts
Enter the number of proposed road cuts.
Number of Road Crossings
Enter the number of proposed road crossings.
Longitudinal Road Bore
Enter the bore footage. (Longitudinal road bores) are not road crossings.
Trenching
Enter the trench footage in the roadway.
Lane Closure
Select Yes or No.
Road Closure
Select Yes or No.
Outside Paved Area
Edit the listed road(s).
Grass Bore Footage
Enter the bore footage
Grass Trench Footage
Enter the bore footage.
Sidewalk Cut
Select Yes or No
Driveway Cut
Select Yes or No
Driveway Bore
Select Yes or No
Aerial Footage
Enter the Aerial footage.
Click Continue Application.
Accela Submitting an Individual Permit Application (Utility)
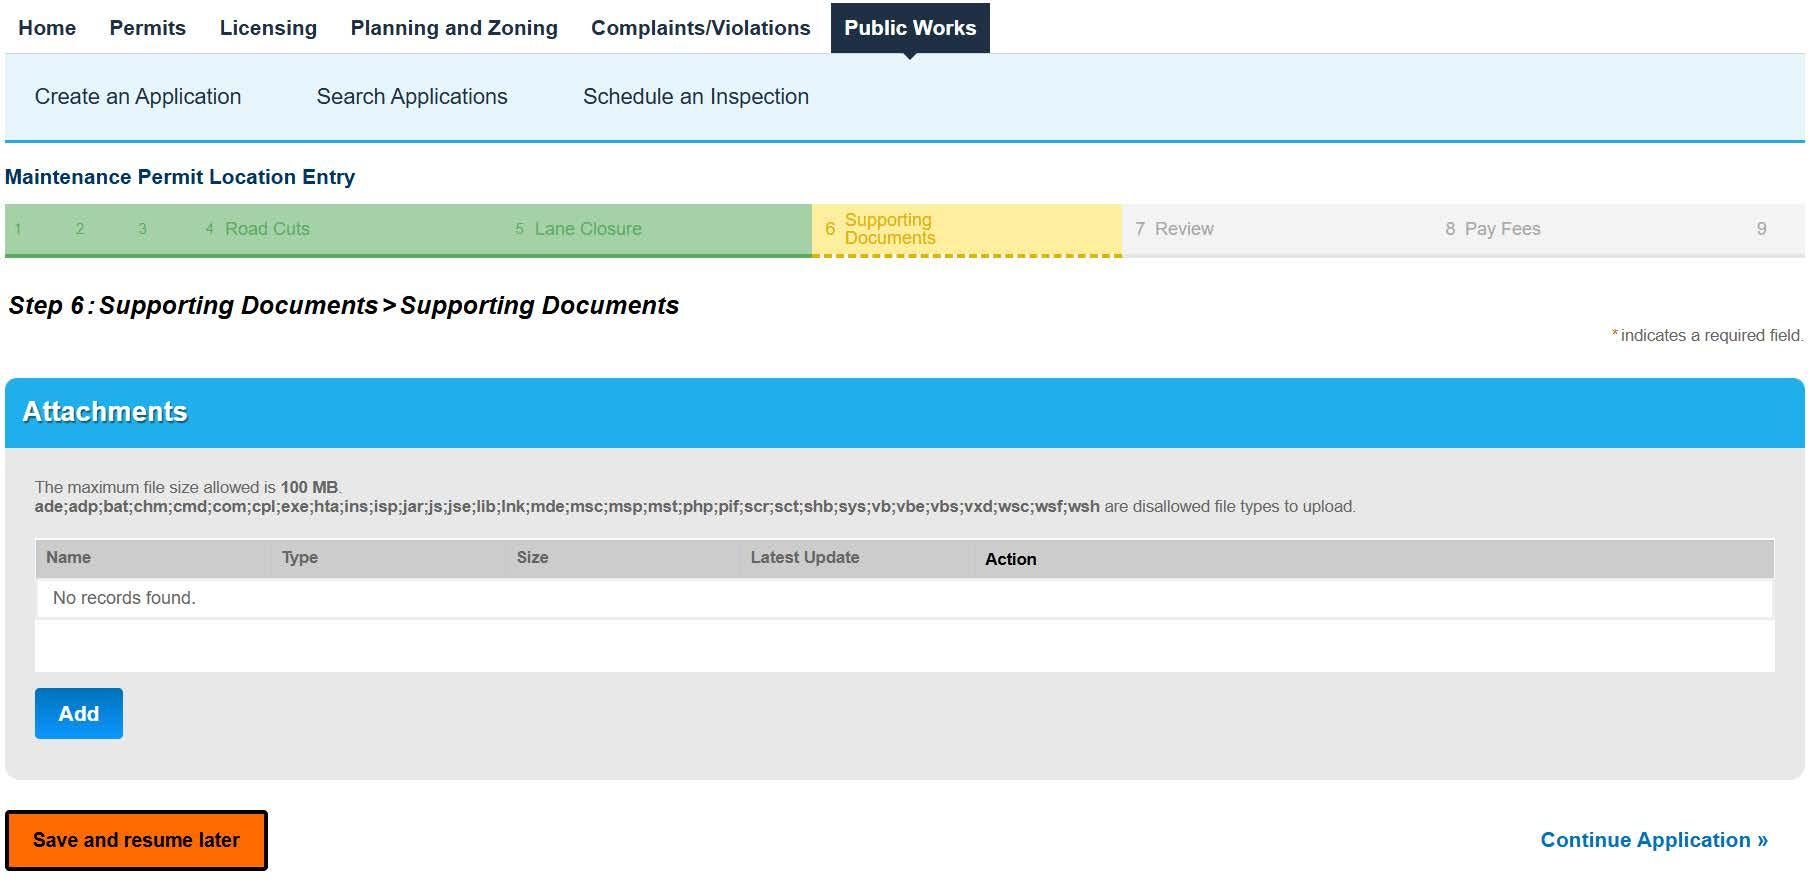
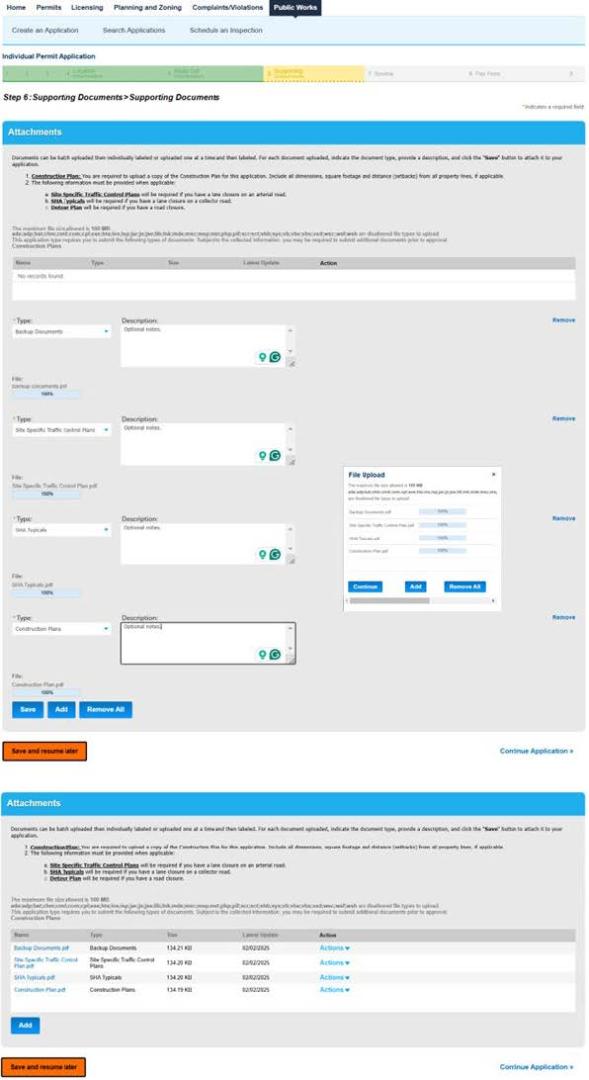
Attachments
Attachments are optional.
Select Add to upload your required documents.
Once the documents have been selected, click Continue.
Label the Attachments.
Attachment Labels
Backup Documents
Construction Plans
Select Add to upload your required documents.
Once the documents have been selected, click Continue.
Label the Attachments.
Attachment Labels
Backup Documents
Construction Plans
Detour Plan
Paved Trench Justification
Right of Way Agreement
Road Closure Form
Road Closure Justification
Road Closure Outreach Materials
Road Closure Outreach Plan
SHA Typicals
Site Photos
Site Specific Traffic Control Plans
Supporting Documents
The app will let you know if you are missing a required attachment.
Click Save.
Review the Attachments and Labels.
Click Continue Application.

Application Review
Click the Certification.
Click Continue Application.
The confirmation number will be displayed on the next page.