Step 1
In order to schedule an inspection the permit must be linked to your account.
- If you are the applicant proceed to Step 2.
- If you are listed as the contractor make sure your license is attached to your account. Instructions for attaching
- If you are not the applicant you will have to contact the Permit Center for assistance.
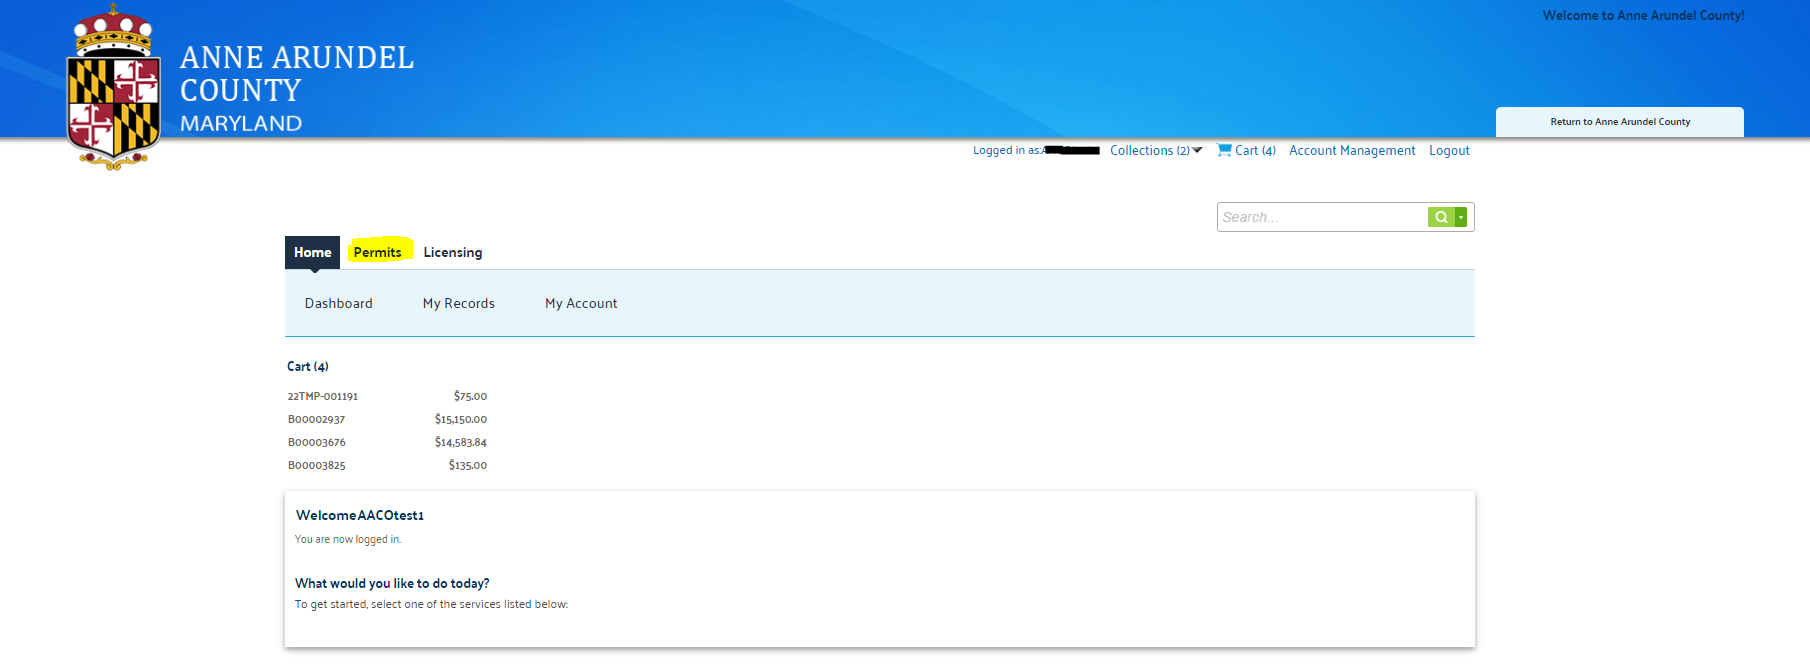
Step 2
- From the Land Use Navigator page, go to Permits
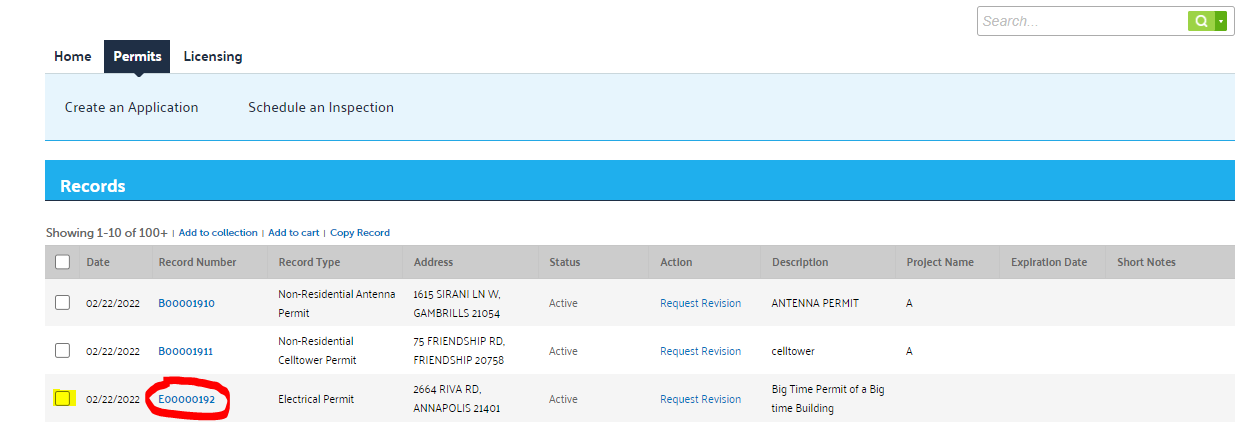
Step 3
- Select a record where an inspection needs to be scheduled by checking the box next to the record number
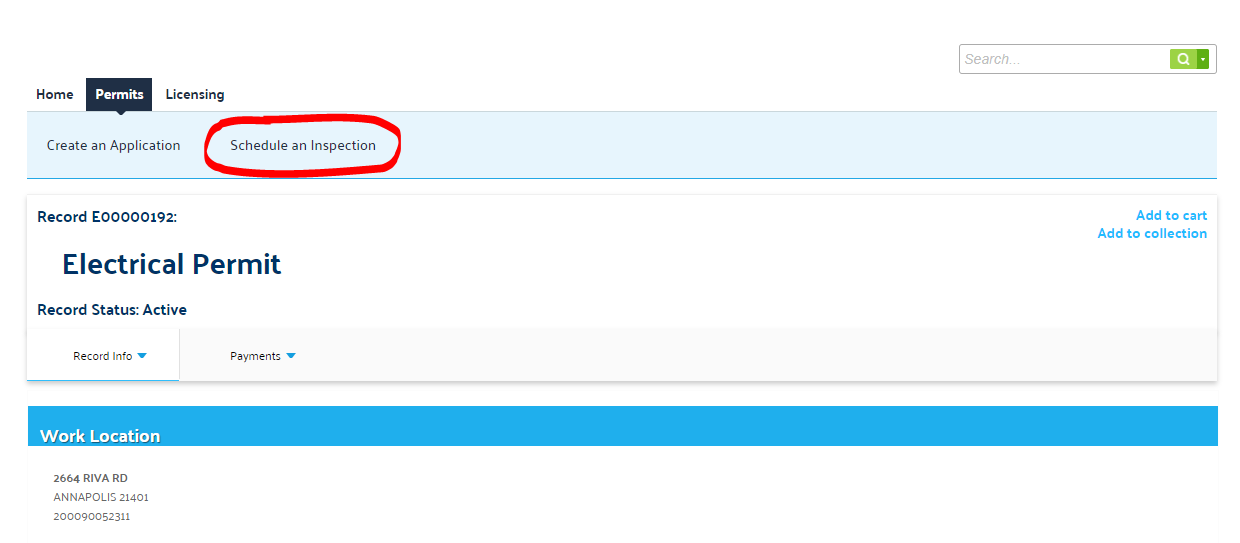
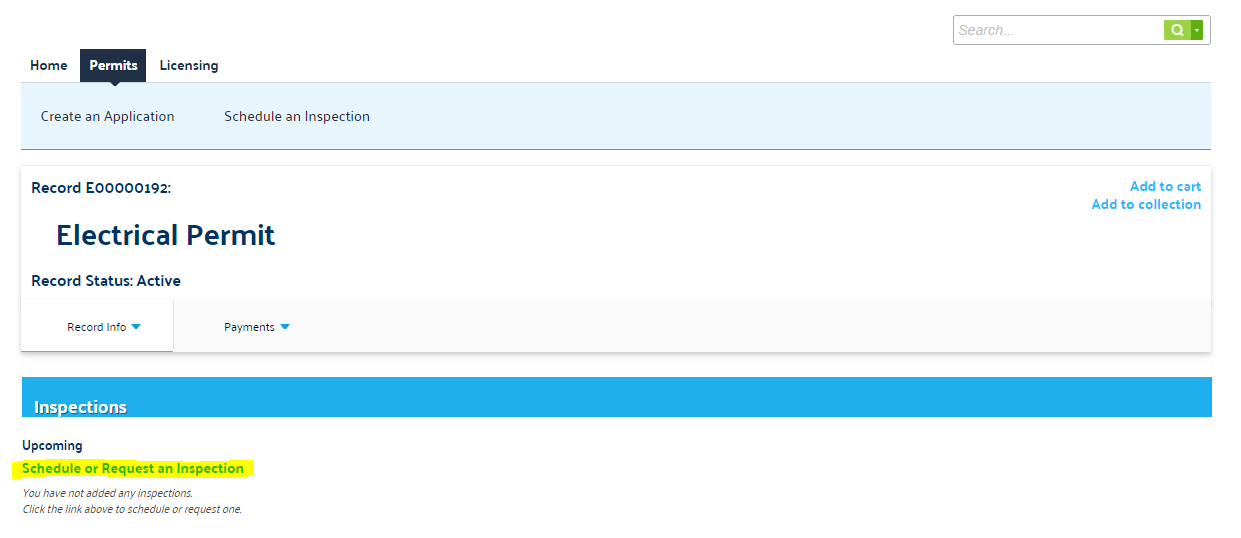
Step 4
- Select Schedule an Inspection
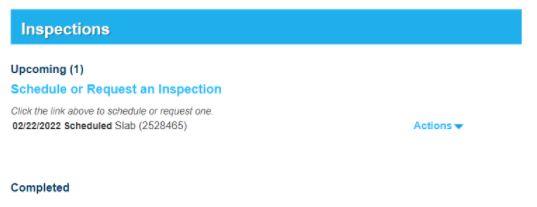
Step 5
- On the following page, select Schedule or Request an Inspection
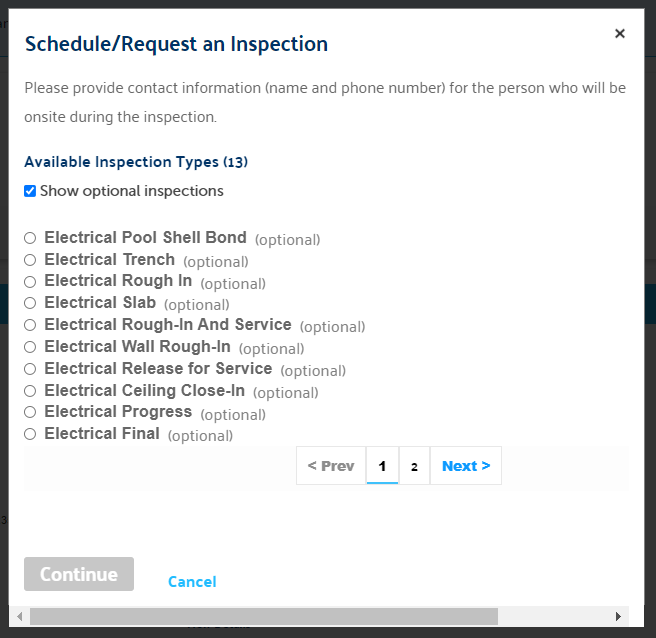
Step 6
- In the pop-up window choose the Inspection Type you would like to schedule. Select Continue at the bottom of the window.
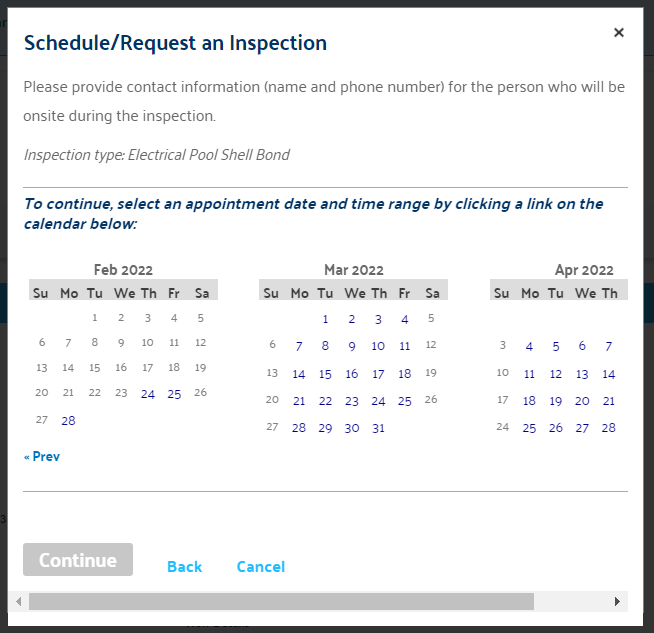
Step 7
- On the following window screen, choose the date you would like to schedule the inspection and also select the All Day button. An inspector will decide the time of day for the inspection based on assigned workload for the day. Select Continue at the bottom of the window.
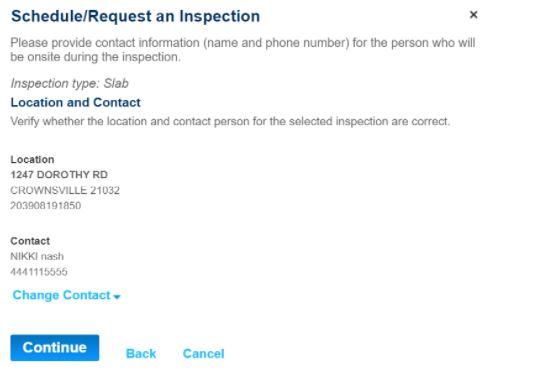
Step 8
- A summary page of the scheduled inspection will appear. Verify the information for the requested inspection and select Continue . Contact information may also be edited by selecting Change Contact .
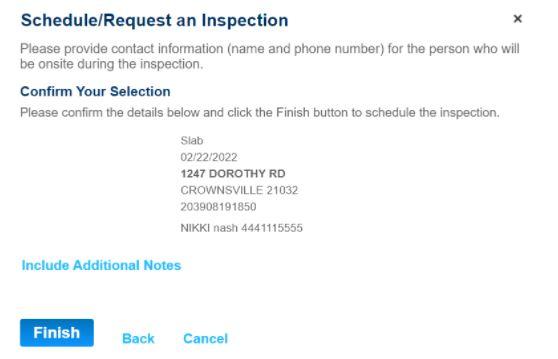
Step 9
- The next page asks for confirmation of the requested inspection. If notes are needed select Include Additional Notes to enter the notes/comments. Select the Finish button.
Step 10
- The screen that follows, displays the requested schedule information.